Showing posts with label Baking. Show all posts

Wednesday, 13 October 2021

Pineapple Upside Down Cake with Rum


NOW this is my kind of cake, loaded with dark rum and delicious for afternoon tea or served warm as a dessert with a dollop of Devonshire cream or custard.
 
 
 Pineapple Upside Down Cake with Rum

Ingredients

    1 large can pineapple rings (8 rings), drained
    2 free-range eggs
    125g/4½oz caster sugar
    150g/5¼oz plain flour
    2 tsp baking powder
    2 tsp vanilla sugar (make your own by placing a split vanilla pod in some caster sugar)
    50g/1¾oz butter, melted
    ½ lemon, zest only
    75ml/2½fl oz milk
    3 tbsp good-quality dark rum

Method
  1. Preheat the oven to 175C/350F/Gas 3.
  2. Line the bottom and the sides of a large ovenproof dish or cake tin with the pineapple rings (cut the pineapple rings in half to line the sides).
  3. In a bowl, whisk together the eggs and sugar until frothy.
  4. In another bowl, mix the flour, baking powder and vanilla sugar together until well combined.
  5. Add the dry ingredients to the egg and sugar mixture and stir to combine.
  6. Add the melted butter, the lemon zest, milk and dark rum to the mixture. Stir to combine.
  7. Pour the mixture into the ovenproof dish over the pineapples. Bake in the oven for 40-50 minutes until risen and golden brown and a skewer inserted comes out clean.
  8. Leave the cake to cool on a wire rack. When it is cooled, cut into slices to serve.


Take a look at these websites for more kitchen information and pictures:
Country Kitchens
Kitchen Gallery
Kitchen Talk


Monday, 22 February 2021

Cheers! Gin and Tonic Cake


At the time writing the pubs are still closed but there is talk of a gradual return to normality. I hope that by the summer I will be sitting in the sun in my local pub garden with  a lovely gin and tonic in a tall glass with ice and lemon. I can but dream!

I tend not to drink at home, apart from the occasional glass of red wine with dinner. Even so, I was drawn to this recipe for a gin and tonic cake. It is a lovely grown-up cake with the taste of gin and tonic without being overpowering. It would make an ideal birthday cake for the G&T lover in your life.

This recipe is from the Delicious Magazine website which includes lots of lovely recipes and handy kitchen tips.

Ingredients

    225g butter, at room temperature
    275g golden caster sugar
    Finely grated zest and juice from 2 limes (put the zest and juice in separate small bowls)
    3 large eggs, beaten
    210g natural full-fat yogurt
    330g self-raising flour
    100ml gin
    100ml tonic
    150g granulated sugar, plus 2 tbsp for sprinkling

Method
Preheat the oven to 160°C/fan140°C/gas 3. Grease a 15cm x 30 cm cake tin and line with baking parchment.

Put the butter in a large mixing bowl and add the golden caster sugar. Add the lime zest and, using an electric whisk (or you can do it by hand), give it a quick whisk to bring it all together. Don’t worry about creaming the mix until fluffy – that’s not necessary with this recipe.

Add the eggs and yogurt to the bowl, then give the mixture another quick whisk. Add the flour then, using a metal spoon, carefully bring the mixture together. Don’t beat the life out of it – mix until the flour has just been incorporated. Spoon the mixture into the lined cake tin and smooth the top.

Bake the cake in the preheated oven for 45 minutes or until a skewer inserted into the centre of the cake comes out clean.

Take out of the oven and leave to cool in the tin for 10 minutes. Meanwhile, put 100g of the granulated sugar into a pan with the gin, tonic and lime juice. Place the pan on a medium heat and bring the mixture to the boil, then let it bubble for 3-4 minutes until the sugar has dissolved. Take off the heat.

Using a fork, carefully poke lots of holes in the top of the cake. Spoon half the syrup over the cake and allow it to soak in. After a couple of minutes spoon over the remaining syrup. It may seem as if there’s a lot of syrup, but it will all sink in to create a wonderfully moist cake – so moist it doubles up as a pudding.

Finally, sprinkle a couple of tablespoons of granulated sugar over the top of the cake, remove it carefully from the tin, then leave to cool on a wire rack.


Monday, 29 June 2020

Cheese And Onion Rolls

Here's a great vegetarian recipe, ideal for a snack, picnic or buffet.

I used Quicke's Mature Cloth-bound Cheddar but you can substitute any strong Cheddar.


Cheese and Onion Rolls


 Ingredients

For the pastry
300g plain flour, plus extra for dusting
1 tsp mustard powder
pinch cayenne pepper
200g block of butter, very cold

For the filling
2 medium potatoes
30g butter
2 large onions, sliced
few thyme sprigs, leaves picked
½ tsp English mustard
200g extra mature cheddar, grated
handful gherkins or pickled onions (or a mixture), roughly chopped


Method
To make the pastry, sift the flour into a large bowl, then stir in the mustard powder, cayenne and 1 tsp salt. Grate the butter into the flour, dipping the end of the block in flour from time to time to prevent it from clumping. Stir the flour and butter together using a table knife, then pour in 120ml ice cold water, mix and bring together to form a dough. Flatten the dough into a disc, wrap in cling film and chill in the fridge for 1 hour.

Meanwhile, make the filling. Cook the potatoes in a pan of salted water until tender, then drain and steam dry for a few mins before mashing and leaving to cool. Melt the butter in a frying pan until
foaming. Add the onions and a pinch of salt, and cook, stirring occasionally, over a medium heat until they’re completely soft and starting to caramelise. Add to a bowl with the potato. Once cool, stir in
the thyme leaves, mustard, cheese and gherkins or pickled onions, and season to taste. Set aside.

Line a baking tray with baking parchment. On a lightly floured surface, roll the pastry out into a large rectangle around 3mm thick. Cut the pastry into eight rectangles, then divide the filling equally between them, squashing it into a sausage shape down the long length of one side of each rectangle, leaving a 5cm gap at each end. Brush the exposed pastry with a little egg, then fold in the short sides of the rectangle and roll the empty half of pastry over the filling so that it is completely encased. Press the edge to seal it, then crimp the two shorter ends with a fork. Repeat with each roll, then transfer to the lined baking tray and chill in the fridge for 20 mins. Can be frozen at this point.

Heat oven to 200C/180C fan/gas 6. Take the rolls out of the fridge, brush all over with the beaten egg.  Bake on the top shelf of the oven for 40 mins or until deeply golden and crisp. Serve hot or cold.


Take a look at these websites for more kitchen information and pictures:
Country Kitchens
Kitchen Gallery
Kitchen Talk

We can email you every time the website is updated. All you have to do is pop your email address in the 'follow by email' link in the panel on the right.

Monday, 3 February 2020

Quick And Easy Flatbreads


This has got to be one of the quickest and easiest "bread" recipes there is! It has only two ingredients (plus a little oil) and, if you are organised and speedy, can be done in just 15 minutes or so (not including 20 minutes resting time). Add a teaspoon of garlic powder if I want a more "zingy" bread.

Flatbreads
 

 Makes 8

Ingredients
250g plain full fat Greek yogurt
250g self raising flour
Oil for rolling out

Method
1 Mix the Greek yogurt and flour together in a large bowl, then leave to rest for 20 minutes at room temperature.
2 Divide the dough into 8 and roll into 8 balls.
3 Heat a small non-stick frying pan over a high heat and roll out your first flatbread to about the side of a side plate – use a little oil on the work surface to stop the dough sticking.
4 When the pan is really hot, lay the flatbread in the pan and cook for 20 seconds, or until the flatbread is covered in brown spots.
5 Flip the flatbread over and cook on the other side for a further 20 seconds, or until covered in brown spots and cooked through.
6 While one flatbread is cooking, roll out the next flatbread so it is ready.


Take a look at these websites for more kitchen information and pictures:
Country Kitchens
Kitchen Gallery
Kitchen Talk

We can email you every time the website is updated. All you have to do is pop your email address in the 'follow by email' link in the panel on the right.

Tuesday, 5 March 2019

Pancakes


 It's Shrove Tuesday - or Pancake Day as it's more commonly known. This is the day in February or March immediately preceding Ash Wednesday (the first day of Lent), which is celebrated in some countries by consuming pancakes - the feast before the famine.

Pancakes are incredibly easy to make. Once cooked you can add the traditional lemon juice and sugar or go mad and concoct your own delicious toppings. Here are a few suggestions:

Salted caramel and hot chocolate
Lemon curd
Chocolate, peanut butter and banana.
Plum and spiced apple
Ice cream and peaches
Honey, yogurt and blueberries
Chocolate spread and strawberries 
Here's Mary Berry's recipe for a basic pancake mix.  


Pancakes


Makes – 12 Thin Pancakes (18-20cm each)

Ingredients
125g plain flour
1 egg and 1 yolk
300ml milk
  

Method
1. Sift 125g plain flour into a bowl and make a well in the middle.

2. Whisk together one egg, one yolk and a little milk taken from the 300ml, in a separate bowl.
Pour into the well. Whisk with a little of the flour.

3. Gradually whisk in half of the remaining milk, drawing in the rest of the flour with a little at a time, to make a smooth batter. Stir in the remaining milk. Cover and leave to stand for about 30 minutes.


5. Heat the frying pan and brush with a little oil.  Ladle two or three tablespoons of batter into the pan and tilt the pan so that the batter spreads out evenly over the bottom.

6. Cook the pancake over a medium-high heat for 45-60 seconds until small holes appear on the surface, the underside is lightly browned and the edge has started to curl. Loosen the pancake and turn it over by tossing or flipping it with a palette knife. Cook the other side for about 30 seconds until golden. Slide the pancake out of the pan.

Heat and lightly grease the pan again before making the next pancake. Serve the pancakes as they are made, or stack them on a plate and reheat before serving. (If the pancakes are hot when you stack them they will not stick together; there is no need to interleave them with greaseproof paper.)
Any uneaten pancakes will keep in a stack for 24 hours or can be frozen.


Salter Digital Scales for accurate measuring


Take a look at these websites for more kitchen information and pictures:
Country Kitchens
Kitchen Gallery
Kitchen Talk

We can email you every time the website is updated. All you have to do is pop your email address in the 'follow by email' link in the panel on the right.

Wednesday, 17 October 2018

Halloween: Graveyard Trifle


Halloween will soon be here. SPOOOOKKKKKKYYYYY!

If you want to impress/frighten your family, have a go at making this Graveyard Trifle. It looks spooktacular and tastes lovely.

This recipe came from via Tesco. There's there's very little actual cooking to be done - but there is a lot of assembling.

Graveyard Trifle

Ingredients
1 x 135g pack lime jelly
green food gel or colouring
425g (14oz) chocolate brownies
125g (4oz) jelly snakes (halved, if long)
500g (1lb) fresh custard
orange food colouring
1/2 x 225g pack soft-baked chocolate cookies
chocolate writing icing
3 rich tea finger biscuits
3 chocolate cornflake clusters
green sugar sand, to decorate (optional) Or can use Green Mini Sugar Balls 

Method
1 Break the jelly into a bowl, add 450ml boiling water and stir until dissolved. Add enough green food colouring to turn the liquid a vivid green; set aside to cool.

2 Crumble the brownies into the base of a glass trifle dish, about 8cm (3in) deep and 18-20cm (7-8in) wide. Press down with the back of a spoon to level the surface. Top with most of the jelly snakes, pushing a few close to the sides of the dish so they can be seen.

3 Put the custard in a bowl and stir in enough orange food colouring to turn it a pale tangerine. Pour it over the snake and brownie layer and spread level. Chill for 30 minutes, or until set. Spoon a little of the cooled liquid jelly over the custard layer to create a film-like layer; chill until set.

4 Carefully pour the remaining jelly over the top and return to the fridge for 4 hours, or until set. In a food processor, whizz the cookies to a fine crumb. Sprinkle over the top of the trifle for the 'soil'. Add the remaining jelly snakes, pushing the ends of each into the crumb 'soil' layer.

5 Decorate the rich tea biscuits with the writing icing to make 'RIP' or cross 'headstones' and push them into the trifle, positioning an 'earthy mound' cornflake cluster at the base of each. Sprinkle with a little sugar sand for 'moss', if you like.


Take a look at these websites for more kitchen information and pictures:
Country Kitchens
Kitchen Gallery
Kitchen Talk

We can email you every time the website is updated. All you have to do is pop your email address in the 'follow by email' link in the panel on the right.

Wednesday, 12 September 2018

Chocolate Beetroot Cake


Chocolate Beetroot Cake

There is plenty of beetroot around at the moment. This lovely vegetable is so versatile and really good for you. It's quite a sweet vegetable so, just like carrots, it makes a great ingredient for cake.

Here's a recipe that's soft, moist and really delicious.

Ingredients
olive oil
plain flour, for dusting
300g dark chocolate (70% cocoa solids)
250g raw grated beetroot
4 large eggs
150g golden caster sugar
120g ground almonds
1 teaspoon baking powder
1 tablespoon cocoa powder

Method
 
1. Preheat the oven to 180°C/350°F/gas 4. Lightly grease the bottom and sides of a 20cm springform cake tin with olive oil. Cut out a circle of greaseproof paper, roughly the same size as the bottom of the tin, and use it to line the base. Dust the sides of the tin lightly with flour, then tap the tin to get rid of any excess.

2. Break 200g of the chocolate (reserving 100g for the topping) into small pieces and add to a heatproof bowl. Place the bowl on top of a small pan of simmering water over a medium heat, making sure the bottom of the bowl isn’t touching the water, and allow to melt, stirring occasionally. Once melted, use oven gloves to carefully remove from the heat and put to one side.

3. Separate the eggs, placing the whites into a large clean mixing bowl and adding the yolks to the beetroot.

4. Stir the sugar, almonds, baking powder, cocoa powder and melted chocolate into the beetroot and mix together well.

5. Use an electric hand whisk to whisk the egg whites until you have stiff peaks. Use a spatula to fold a quarter of the egg whites into the beetroot mixture to loosen, then once combined, fold in the rest but try not to over-mix.

6. Add the mixture to the prepared cake tin and spread out evenly using a spatula.

7. Bake in the hot oven for around 50 minutes, or until risen and cooked through.

8. Allow the cake to cool slightly, then carefully turn it out on to a wire rack to cool completely.

9. When ready to serve, melt the remaining chocolate and drizzle over the top.

This is delicious served just as it is or with a dollop of cream, creme fraiche or natural yogurt.


Take a look at these websites for more kitchen information and pictures:
Country Kitchens
Kitchen Gallery
Kitchen Talk

We can email you every time the website is updated. All you have to do is pop your email address in the 'follow by email' link in the panel on the right.

Thursday, 30 August 2018

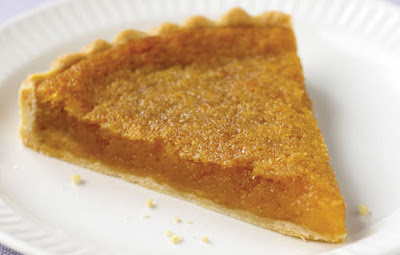
India Pale Ale Treacle Tart


There's a distinct nip in the air here in Devon although the sun is still shining. What could be better on a golden autumn evening than a lovely treacle tart and clotted Devonshire cream? This one includes IPA (India Pale Ale) which creates depth to the flavour.

Here's my tried and tested recipe. You don't, of course, have to have it with clotted cream, custard is a family favourite too!

Treacle Tart

Ingredients

Pastry
250g plain flour
125g chilled and chopped unsalted butter
75g icing sugar
2 egg yolks
Filling
700g golden syrup
50g honey
250g breadcrumbs
½ grapefruit, zest only
100ml IPA
3 medium eggs

Method

1 Put flour and butter in a bowl and rub together with fingertips until it resembles breadcrumbs. Mix in the icing sugar followed by the egg yolks. If the pastry feels too dry, add 2 tbsp water. Shape into a ball, flatten it out into a disc, wrap it in cling film, then chill for 30 mins.

2 Roll out the pastry on a lightly floured surface until big enough to line a 23cm fluted tart tin, about 3cm deep. Line the tin with the pastry, allowing the edges to overhang. Chill for another 30 mins.

3 Heat oven to 200C/180C fan/gas 6. Line the tart with baking parchment and baking beans and bake blind for 20 mins. Remove the beans and parchment and bake for 10-15 mins more until the pastry is golden and crisp.

4 While the pastry is cooking, mix the golden syrup, honey, breadcrumbs, grapefruit zest, beer and eggs together in a large jug or bowl.

5 Lower oven to 160C/140C fan/gas 3. Trim the pastry edges, then fill with the treacle mixture. Bake for 55 mins-1 hr until golden.


Take a look at these websites for more kitchen information and pictures:
Country Kitchens
Kitchen Gallery
Kitchen Talk

We can email you every time the website is updated. All you have to do is pop your email address in the 'follow by email' link in the panel on the right.

Friday, 21 April 2017

Carrot And Walnut Cake


I love carrot cake and this is one of my favourite recipes. It comes via Delicious Magazine and includes sultanas, walnuts and desiccated coconut.

Carrot And Walnut Cake

Ingredients

Sunflower oil to grease
250g unsalted butter, softened
250g caster sugar
4 large free-range eggs
1 tbsp vanilla extract
250g self-raising flour
1 tsp baking powder
1 tbsp mixed spice
50g desiccated coconut
75g sultanas
50g walnuts, roughly chopped
100g carrot, grated (about 1 large carrot)
Edible flowers to decorate (optional)
For the cream cheese icing
150g unsalted butter, well softened
450g full-fat cream cheese (we like Philadelphia)
150g icing sugar
1 tsp vanilla extract
Finely grated zest 1 lemon

Method

1. Heat the oven to 180C/fan160C/gas 4. Lightly oil and bottom-line 3 x 20-cm sandwich tins. Cream the butter and sugar together in a large mixing bowl until fluffy and light. Add the eggs one by one, beating well after each addition, then beat through the vanilla extract. Fold in the flour and baking powder with a pinch of salt, then fold in the mixed spice, coconut, sultanas, walnuts and carrot.

2. Divide the mixture between the tins, then bake for 20-25 minutes until risen, springy and a skewer pushed into the centres comes out clean. Leave to cool in the tins for 10 minutes, then turn out onto wire racks to cool completely.

3. Meanwhile, make the icing. Beat the butter and cream cheese together until smooth, then gradually beat in the icing sugar. Stir through the vanilla and lemon zest, then chill until ready to use.

4. To assemble the cake, put a cooled sponge on a serving plate (if it has risen a lot you may need to slice off the top or put the sponge upside-down), then spread over a thin layer of icing. Top with another sponge, then repeat with another layer of icing. Top with the third sponge, then use the rest of the icing to completely cover the cake. Decorate with the edible flowers (optional) and serve immediately.

MAKE AHEAD The iced cake will keep for up to 2 days in the fridge. Freeze the cooked, un-iced sponges for up to 3 months, well-wrapped in cling film. Defrost completely to ice and decorate.


Take a look at these websites for more kitchen information and pictures:
Country Kitchens
Kitchen Gallery
Kitchen Talk

Subscribe to Kitchen Cook and we'll email you every time the website is updated. All you have to do is pop your email address in the 'subscribe' form in the panel on the right.

Friday, 10 March 2017

Chocolate Guinness Cake

This is a wonderful recipe posted on my friend's blog at www.frantaffsticbakes.co.uk/ Have a look at it for lots more scrumptious bakes. I used to work with Fran and can testify at first hand that her baking skills are second to none.

This cake includes two of my favourite things - alcohol and chocolate!


Chocolate Guinness Cake


Ingredients
250ml Guinness
250g unsalted butter
80g cocoa powder
400g caster sugar
2 free range eggs
1tsp vanilla essence
140ml buttermilk
280g plain flour
2tsp bicarbonate of soda
1/2 tsp baking powder
For the frosting
50g unsalted butter
300g icing sugar
125g full-fat cream cheese
Cocoa powder for dusting (optional but pretty)

Method
    Preheat oven to 170C and line the base of a 20cm cake tin with greaseproof paper.
    Heat the Guinness and butter in a saucepan, remove from the heat and stir in the cocoa powder and sugar.
    Mix the eggs, vanilla essence and buttermilk and then add to the Guinness mixture.
    Sift the remaining ingredients into a large bowl or freestanding mixer. Set your mixer or a hand-held whisk on low and pour in the Guinness mixture. Mix well until everything is combined.
    Pour the batter (it will be quite runny but this is normal) into the cake tin and bake for around 45 minutes or until you have a lovely bouncy sponge which springs back when lightly pressed. Let it cool completely and then turn out.
    Make the frosting by mixing the icing sugar and butter together until sandy. Add the cream cheese and mix further until combined and light and fluffy.
    Spread the frosting all over the gorgeous cake and sprinkle with cocoa powder to finish.  Serve with a generous amount of double cream.


This is a tried and tested recipe from the wonderful Hummingbird Cake Book.


Take a look at these websites for more kitchen information and pictures:
Country Kitchens
Kitchen Gallery
Kitchen Talk

Subscribe to Kitchen Cook and we'll email you every time the website is updated. All you have to do is pop your email address in the 'subscribe' form in the panel on the right.

Friday, 14 October 2016

Egg Custard Tarts

IT'S World Egg Day and to celebrate I am recreating a taste of my youth, Egg Custard Tarts. They immediately take me back to my childhood farmhouse kitchen with my mum baking delicious food in the Aga.

All our hens were properly free range and one of my chores was searching out their nests and gathering the eggs.

I haven't made these tarts in a while but I found this lovely recipe on the British Red Lion egg recipes site.


Egg Custard Tarts

Serves 6

Ingredients

For the pastry:
225g plain flour
50g icing sugar
A pinch of salt
125g unsalted butter, cubed
1 large British Lion egg
A little more butter for greasing
  
For the filling:
250ml whole milk
250ml double cream
2 Large British Lion eggs
2 Large British Lion egg yolks
75g caster sugar
1 tsp vanilla essence
Freshly grated nutmeg

Method
To make the pastry: Place the flour, icing sugar, salt and butter in a food processor and blitz until it looks like breadcrumbs. Alternatively, place the dry ingredients in a bowl and rub in the butter using your fingertips.

Add the egg to the pastry crumb mix and blitz in the processor or stir in with a knife,    until the mixture comes together and forms a ball. Wrap and chill for 20 minutes

Meanwhile for the filling: Pour the milk and cream into a pan and slowly bring to the boil. Place the eggs and egg yolks in a large jug add the sugar and vanilla essence and beat together until creamy. Remove the milk from the heat, then pour it over the eggs and stir well. Return it to the pan, then place a fine meshed sieve over the jug and pour the mixture back through the sieve. Set aside.

To line the tins with pastry: Cut the dough into four pieces. Take the first piece and thinly roll it out, dusting the work top and rolling pin with flour. When it is about 2 mm thick, use a 10cm/4in plain cutter (or draw around a saucer if you prefer) to press out 3 rounds of pastry, rerolling pastry if necessary. Repeat to roll out 12 circles of pastry the same way.

Butter the base and sides of each of the 12 holes of a muffin tin - this ensures the pastry doesn’t stick. Carefully push the pastry rounds into the holes, trying not to stretch the pastry too much. Push it neatly into the base and sides of each to tart case.

Line each pastry case with baking parchment and baking beans. Place the muffin tin on a baking tray and bake for 10 minutes. Remove the paper and beans and bake for a further 5 minutes or until the pastry is pale golden and the bases are dry.

Reduce the oven temperature to Fan130oC/150oC/Gas Mark 2. Carefully pour the prepared custard into the pastry cases, then sprinkle a little freshly grated nutmeg over each. Return to the oven and bake for a further 15-20 minutes or until the custard is firm, with a slight wobble. Cool for 5 minutes in the tin before removing. Best served chilled.

(For a more exotic egg recipe, have a look at my previous post featuring Hot and Sour Egg Drop Soup.)


Take a look at these websites for more kitchen information and pictures:
Country Kitchens
Kitchen Gallery
Kitchen Talk

Subscribe to Kitchen Cook and we'll email you every time the website is updated. All you have to do is pop your email address in the 'subscribe' form in the panel on the right.

Thursday, 15 September 2016

Churros

WATCHING Great British Bake Off last night had an added poignancy knowing that this would be the last series on the BBC. I don't know what you think but I fear the much-loved, quintessentially British programme will never be the same again, especially without the irreverent Mel and Sue. It seems Mary Berry might not be crossing over either and Paul Hollywood is still making up his mind.

Last night it was Batter Week. I was entranced by the churros never having eaten them before. Here are a couple of YouTube videos showing you how to make them. Good luck!


The sainted Mary Berry's cookbook! Mary Berry's Absolute Favourites


Take a look at these websites for more kitchen information and pictures:
Country Kitchens
Kitchen Gallery
Kitchen Talk

Subscribe to Kitchen Cook and we'll email you every time the website is updated. All you have to do is pop your email address in the 'subscribe' form in the panel on the right.

Wednesday, 31 August 2016

Mary Berry's Malted Chocolate Cake

Fans of The Great British Bake Off are no doubt fans of Mary Berry too. Here's a lovely chocolate cake of hers from Mary Berry's Absolute Favourites cook book. Mary said: "This cake is the perfect family treat, and a real crowd-pleaser. The malt extract gives a lovely creaminess to the sponge, while the malted chocolate flavour is echoed in the cake’s topping."

Mary Berry's Malted Chocolate Cake


Prepare ahead

The filling will remain soft and ready to use in a bowl covered with cling film for 2–3 days. The finished cake can be kept in an airtight container for up to a day.

Freeze

Freeze the cake and icing separately, then defrost at room temperature and assemble when ready to serve.

Ingredients

30g (1oz) malted chocolate drink powder
30g (1oz) cocoa powder
225g (8oz) butter, softened, plus extra for greasing
225g (8oz) caster sugar
225g (8oz) self-raising flour
1 tsp baking powder
4 eggs

For the icing

3 tbsp malted chocolate drink powder
1½ tbsp hot milk
125g (4½oz) butter, softened
250g (9oz) icing sugar, plus extra for dusting
50g (2oz) dark chocolate (at least 50 per cent cocoa solids), melted
1 tbsp boiling water
About 20 Maltesers, to decorate

Method

1. You will need two 20cm (8in) round sandwich tins. Preheat the oven to 180°C/160°C fan/Gas 4 and grease the tins with butter and line the bases with baking paper.

2. Measure the malted chocolate drink powder and cocoa powder into a large bowl, pour over 2 tablespoons of water and mix to a paste. Add the remaining cake ingredients and beat until smooth.

3. Divide evenly between the prepared tins and bake in the oven for 20–25 minutes. Set aside in the tins to cool for 5 minutes, then turn out on to a wire rack to cool completely.

4. To make the icing, measure the malted chocolate drink powder into a bowl, add the hot milk and mix until smooth. Add the butter, icing sugar and melted chocolate and mix again until smooth, then add the boiling water to give a gloss to the icing.

5. Place one cake on a plate and spread over half the icing. Sandwich with the other cake and spread (or pipe) the remaining icing on top, using the tip of a rounded palette knife to create a swirled effect from the centre to the edge of the cake. Arrange the Maltesers over the top and dust with icing sugar before serving.

Here's another wonderful book on baking:

Mary Berry's Baking Bible A comprehensive book on baking with 250 recipes


Take a look at these websites for more kitchen information and pictures:
Country Kitchens
Kitchen Gallery
Kitchen Talk

Subscribe to Kitchen Cook and we'll email you every time the website is updated. All you have to do is pop your email address in the 'subscribe' form in the panel on the right.

Thursday, 4 February 2016

Devonshire Splits

TODAY I am taking a step back into my childhood to bring you a recipe for Devonshire Splits. My father was a bellringer and belonged to a team which competed all over the county. Often after a ringing competition there would be tea laid on in the village hall. These were sumptuous spreads with all kind of sandwiches, cakes, sausage rolls and pasties.

Inevitably there would also be Devonshire splits. In recent years these have lost favour to scones. I love a nice cream tea with scones but occasionally it's good to ring the changes (geddit?) and use a split instead.

A Devonshire Split is a smallish yeast bun with a soft top dusted with flour. They are cut at a slant - not all the way through - to make a wide opening for the filling of cream and jam so they look like a bright Devonshire smile.  If the jam is home-made, so much the better. As for the cream, you can use clotted, thick double cream or whipped double cream, whichever you prefer.

Here is a Nigel Slater recipe.


Devonshire Splits

Makes 8-10

450g plain flour
½ tsp salt
14g dried easy-bake yeast (2 sachets)
2 tsp caster sugar
30g butter
285-300ml milk
a little extra flour for kneading
cream and jam to fill

Directions

Sift the flour and salt into a large bowl. Sprinkle the yeast and caster sugar into the flour. Warm the butter and milk in a small pan until the butter has melted. Let the milk cool slightly, until it is just about cool enough to dip your finger in.

Pour enough of the milk and butter mixture into the flour to form a soft dough. You may not need all of it. The dough should be soft and slightly sticky. Mix it with your hands to form a ball.

Tip the dough out on to a floured work surface. Knead the dough lightly for about five minutes until it feels slightly elastic. Return to the bowl and cover loosely with a clean tea towel or clingfilm and put in a warm place.

After an hour or so the dough should have doubled in size. Turn the dough out once more on to the floured board and cut into 8 to 10 pieces. Roll each one into a ball, placing them on a lightly floured baking sheet as you go. I find this easiest in the palm of my hand, but other people like to roll them on the board.

Set the oven at 200C/gas mark 6. Dust the buns lightly with flour and leave to rise slightly, covered by a tea towel, for 10-15 minutes. Bake for 18-20 minutes until they are pale gold on top and sound slightly hollow when tapped on the bottom.

Remove the buns from the baking sheet to a cooling rack for a few minutes. Serve while they're still warm.

When cool, split and add the filling.


Take a look at these websites for more kitchen information and pictures:
Country Kitchens
Kitchen Gallery
Kitchen Talk

Subscribe to Kitchen Cook and we'll email you every time the website is updated. All you have to do is pop your email address in the 'subscribe' form in the panel on the right.


Wednesday, 27 January 2016

Lemon Drizzle Traybake

  • Take a look at the traybake tin at the bottom of the page.

LEMON adds a zing to all kinds of sweet and savoury recipes. This traybake by the esteemed Mary Berry is one of my favourite recipes. The traybake is moist with a crunchy topping. It is so easy to make and utterly delicious. The cake needs to be still warm when the topping is added so that it absorbs the lemon syrup easily, leaving the sugar on top. Do allow the cake to cool a little though – if it is too hot the syrup will tend to run straight through.

Lemon Drizzle Traybake


Preparation time: about 10 minutes
Cooking time: about 35-40 minutes

Cuts into about 30 squares

Ingredients

225g (8 oz) butter , softened
225g (8 oz) caster sugar
275g (10 oz) self-raising flour
2 teaspoons baking powder
4 eggs
4 tablespoons milk
finely grated rind of 2 lemons

Crunchy Topping

175g (6 oz) granulated sugar
juice of 2 lemons


Cut a rectangle of non-stick baking parchment  to fit the base and sides of a traybake tin or roasting tin, 30 x 23 x 4 cm (12 x 9 x 1 ½ inches). Grease the tin and then line with the paper, pushing it neatly into the corners of the tin. Pre-heat the oven to 160°C/325°F/Gas 3.


Measure all the ingredients for the traybake into a large bowl and beat well for about 2 minutes until well blended, an electric mixer is best for this but of course you can also beat by hand with a wooden spoon. Turn the mixture into the prepared tin, scraping the sides of the bowl with a plastic spatula to remove all of the mixture. Level the top gently with the back of the spatula. Bake in the middle of the pre-heated oven for about 35-40 minutes or until the traybake springs back when pressed lightly with a finger in the centre and is beginning to shrink away from the sides of the tin.

Allow the traybake to cool in the tin for a few minutes then lift the traybake out of the tin still in the lining paper. Carefully remove the paper and put the traybake onto a wire rack placed over a tray (to catch drips of the topping).

To make the crunchy topping, mix the lemon juice and granulated sugar in a small bowl to give a runny consistency. Spoon this mixture evenly over the traybake whilst it is still just warm. Cut into about squares when cold.
Country Kitchens
Kitchen Gallery
Kitchen Talk

Subscribe to Kitchen Cook and we'll email you every time the website is updated.  All you have to do is pop your email address in the 'follow by email' link in the panel on the right.


This website is a participant in the Amazon Services LLC Associates Program, an affiliate advertising program designed to provide a means for sites to earn advertising fees by advertising and linking to amazon.co.uk and amazon.com


Friday, 19 June 2015

Chocolate Eclairs


Fans of the BBC's The Great British Bake Off will be familiar with presenter Paul Hollywood. Baking runs in his blood. His grandfather was head baker at The Adelphi Hotel in Liverpool. His father was also a baker and Paul worked for him as a teenager before going on to become head baker at several hotels. He is particularly famous for his bread but here is Paul's recipe for chocolate eclairs.

Chocolate Eclairs  
Ingredients

For the choux pastry

65g/2½oz plain flour, sifted
pinch salt
50g/2oz unsalted butter, diced, plus extra for greasing
2 free-range eggs, beaten

For the filling

200ml/7fl oz whipping cream
5 tsp icing sugar, sifted
1 tsp vanilla extract
For the icing
100g/3½oz milk chocolate, chopped

Method

Preheat the oven to 200C/400F/Gas 6. Generously grease a baking tray with butter.
Sift the flour onto a sheet of greaseproof paper.

Put 120ml/4fl oz water into a medium-sized pan with the salt and butter and heat gently until the butter has completely melted – don’t let the water boil and begin to evaporate. Quickly bring the mixture to the boil and tip in all the flour in one go. Remove the pan from the heat and beat furiously with a wooden spoon – don’t worry, the mixture will look messy at first but will soon come together to make a smooth heavy dough.

Put the pan back on a low heat and beat the dough for about a minute to slightly cook the dough – it should come away from the sides of the pan to make a smooth, glossy ball. Tip the dough into a large mixing bowl and leave to cool until tepid.

Beat the eggs in a bowl until combined, then gradually beat them into the dough with an electric whisk or mixer, or a wooden spoon, beating well after each addition. (You may not need all the egg.) The dough should be very shiny and paste-like, and fall from a spoon when lightly shaken.
Spoon the pastry into a piping bag fitted with a 1.25cm/½in plain nozzle and pipe 12 x 10cm/4in lengths onto the greased baking tray.

Sprinkle the tray, not the pastry, with a few drops of water, and bake in the oven for 15 minutes. Then, without opening the door, reduce the oven temperature to 170C/325F/Gas 3 and bake for 10 minutes, or until golden-brown and crisp.

Remove the tray from the oven and carefully make a small hole in the side of each éclair to allow steam to escape. Return to the oven and bake for a further five minutes, or until the pastry is completely crisp. Remove from the oven and transfer to a wire rack to cool.

For the filling, whip the cream with the sugar and vanilla extract in a bowl until just stiff.
Once the éclairs have cooled, cut down the length of one side of each éclair and pipe in the whipped cream.

Melt the chocolate over a double boiler or a bowl suspended over a pan of simmering water (do not allow the bottom of the bowl to touch the water) and allow it to cool slightly. Dip the tops of the éclairs in the chocolate and let the chocolate set before serving.


Take a look at these websites for more kitchen information and pictures:
Country Kitchens
Kitchen Gallery
Kitchen Talk

Subscribe to Kitchen Cook and we'll email you every time the website is updated. All you have to do is pop your email address in the 'subscribe' form in the panel on the right.
Tuesday, 16 June 2015

Chocolate Swiss Roll


Fancy a slice of something sweet to go with afternoon cuppa? Try this rich and delicious chocolate and cream swiss roll.

Chocolate Swiss Roll
Ingredients

6 large eggs
150g/ 2/3cup, caster/fine sugar
225g/8oz dark chocolate, 60% or greater
For the Filling
355ml/1 ½ cups double (heavy) cream
½ tsp vanilla extract
To Serve
Fresh raspberries or strawberries or other soft fruits - optional
Cocoa powder for dusting
Preheat the oven to 220°C/ 425°F/gas 7

Method

Lightly grease and line a 23 x 33/ 9 x 13 inch Swiss Roll tin. Using a small piece of kitchen paper lightly dampened with a little vegetable oil, lightly rub the surface of the paper.

Separate the egg yolk and white, reserve each in different bowls. Mix the sugar and egg yolks together in a large, roomy, baking bowl. Whisk with either an electric hand whisk or a hand whisk until a light, yet thick mixture is formed.

Melt the chocolate with 4 tbsp water in either the microwave (take care to not overcook) or over a pan of slightly simmering, boiling water making sure the bottom of the bowl does not touch the water.

Add the chocolate to the egg and sugar mix and stir gently.

In a separate, clean bowl, whisk the egg whites until fairly stiff, they should form fairly firm peaks when the whisk is lifted from the bowl. Fold a tablespoon of the egg white through the chocolate sponge mixture, then add the remaining whisked egg whites and gently fold through.

Place the sponge mix into the prepared tin, smooth very, very gently with a spatula to smooth out the surface and fill the tin taking care to not knock out any air. Bake in the preheated oven for 12 minutes, or until firm to the touch. Do not overcook or the sponge will become dry. Place the tin on a cooling rack and leave to cool.

Rolling Up

Lay a large sheet of greaseproof paper onto the work surface, flip the Swiss roll tin over onto the paper and gently ease the sponge out. Peel away the paper on the sponge and tidy up any ragged edges of the cake.

Whip the cream lightly but enough that the cream will loosely hold its shape. Spread the cream evenly over the entire surface of the cake leaving a 2cm/3/4" margin on either of the two short sides.
Using a small sharp knife cut a small incision 2cm /3/4" in from one of the short edges taking care not to cut right through the cake. Carefully fold this in towards the cream, then use the paper on the work surface roll the cake away from you until a log is formed. Do not worry if cracks appear on the surface, these are part of the character of a Swiss Roll.

Serve the cake dusted with cocoa powder, or icing.

  • Take a look at these websites for more kitchen information and pictures:
    Country Kitchens
    Kitchen Gallery
    Kitchen Talk

    Subscribe to Kitchen Cook and we'll email you every time the website is updated. All you have to do is pop your email address in the 'subscribe' form in the panel on the right.

Thursday, 2 August 2007

Devon Dough Cake


I WAS taking a look at the recipes on the UKTV food site when I came across one for Devon Dough Cake.

It brought back memories of my childhood, sitting around a big farmhouse kitchen in my grandmother's house, eating warm dough cake with homemade butter.

It was submitted to the site by a member of the public who says: "This recipe was cooked every week by my Auntie Paula in her home in Newton Poppleford, near Sidmouth in Devon. She made it every week of her life and it was made by her mother too I believe.

"It seems to be a Devon recipe and it is not one I've ever come across since she died 30 years ago. It is basically a fruited bread, but has a unique taste and one enjoyed by the Woodley family for generations.

"As a girl I would be given half a slice of dough cake and two chocolate buttons from Auntie Paula when I got home from school. If I was really good, she would butter the bread, but that was considered a treat!"

My grandmother was from Devon so I suspect she used much the same recipe. I hadn't tasted it for years so made some to try. It was delicious and I was immediately transported back to my days of pigtails and ankle socks!


Here's the recipe:

Devon Dough Cake

Servings: makes 1lb loaf

Ingredients

225g strong plain flour
25g butter 1 tsp fast action yeast
1 egg
50ml milk
pinch grated nutmeg
15g chopped citrus peel
25g sugar
50g currants

Method
  1. Sieve the flour with a pinch of salt and rub in the butter to make breadcrumbs.
  2. Stir in the yeast.
  3. Add 50ml water and the milk, together with the remaining ingredients.
  4. Mix to a soft dough, a little softer than bread dough.
  5. Knead well on a floured board for 5 mins, then place in a greased and warmed small 1 lb loaf tin.
  6. Leave in a warm place, covered with oiled cling film until the dough rises to the top of the tin. Bake in a pre heated oven 375F/180c/160c fan, for 30 mins until golden and risen.
  7. Cool and serve sliced.

Take a look at these websites for more kitchen information and pictures: 
Country Kitchens
Kitchen Gallery
Kitchen Talk

Subscribe to Kitchen Cook and we'll email you every time the website is updated. All you have to do is pop your email address in the 'subscribe' form in the panel on the right.

Saturday, 31 March 2007

Rhubarb Custard Bars

EARLY rhubarb is in season so have a look around the markets. Recipes abound for this versatile fruit but for a change from the usual rhubarb pie or crumble, below is a recipe for a delicious rhubarb and custard bar.

If you want more recipes or information on how to grow rhubarb this site has everything you need: www.rhubarbinfo.com


Rhubarb Custard Bars

Ingredients
2 cups all-purpose flour
1/4 cup sugar
1 cup cold butter
FILLING:
2 cups sugar
7 tablespoons all-purpose flour
1 cup heavy whipping cream
3 eggs, beaten
5 cups finely chopped fresh or frozen rhubarb, thawed and drained
TOPPING:
2 packages (3 ounces each) cream cheese, softened
1/2 cup sugar
1/2 teaspoon vanilla extract
1 cup heavy whipping cream, whipped

Directions
In a bowl, combine the flour and sugar; cut in butter until the mixture resembles coarse crumbs. Press into a greased 13-in. x 9-in. baking pan. Bake at 350° for 10 minutes.
Meanwhile, for filling, combine sugar and flour in a bowl. Whisk in cream and eggs. Stir in the rhubarb. Pour over crust. Bake at 350° for 40-45 minutes or until custard is set. Cool.
For topping, beat cream cheese, sugar and vanilla until smooth; fold in whipped cream. Spread over top. Cover and chill. Cut into bars. Store in the refrigerator. Yield: 3 dozen.

Take a look at these websites for more kitchen information and pictures:
Country Kitchens
Kitchen Gallery
Kitchen Talk

Subscribe to Kitchen Cook and we'll email you every time the website is updated. All you have to do is pop your email address in the 'subscribe' form in the panel on the right.

Wednesday, 21 February 2007

Herby Scones


CHIVES: This versatile herb is a member of the onion (allium) family and its leaves can be harvested from February right up to early winter. Try these herby scones - wonderful if eaten still warm with melting butter and cheese.


Herby Scones
(Makes 16)

275g (10oz) self-raising flour
75g (3oz) butter
125ml (4fl oz) milk
1tsp dried mixed herbs
4 leaves of fresh chives, snipped
2tbsp fresh chopped parsley
pinch salt

Method
Pre-heat oven to 200C/Gas 6. Rub the butter lightly into flour, lifting the mixture to add air, until the mixture resembles breadcrumbs. Add the salt and mix in the milk to make a soft dough. Alternatively, put all the ingredients into a food processor.
Roll out the dough to 1 cm (1/2 inch) thick. Use a small scone cutter and cut 16 scones. Place onto a greased baking sheet. Bake for 14-16 minutes. Take out of the oven and cool on wire racks.

Take a look at these websites for more kitchen information and pictures:
Country Kitchens
Kitchen Gallery
Kitchen Talk

Subscribe to Kitchen Cook and we'll email you every time the website is updated. All you have to do is pop your email address in the 'subscribe' form in the panel on the right.